

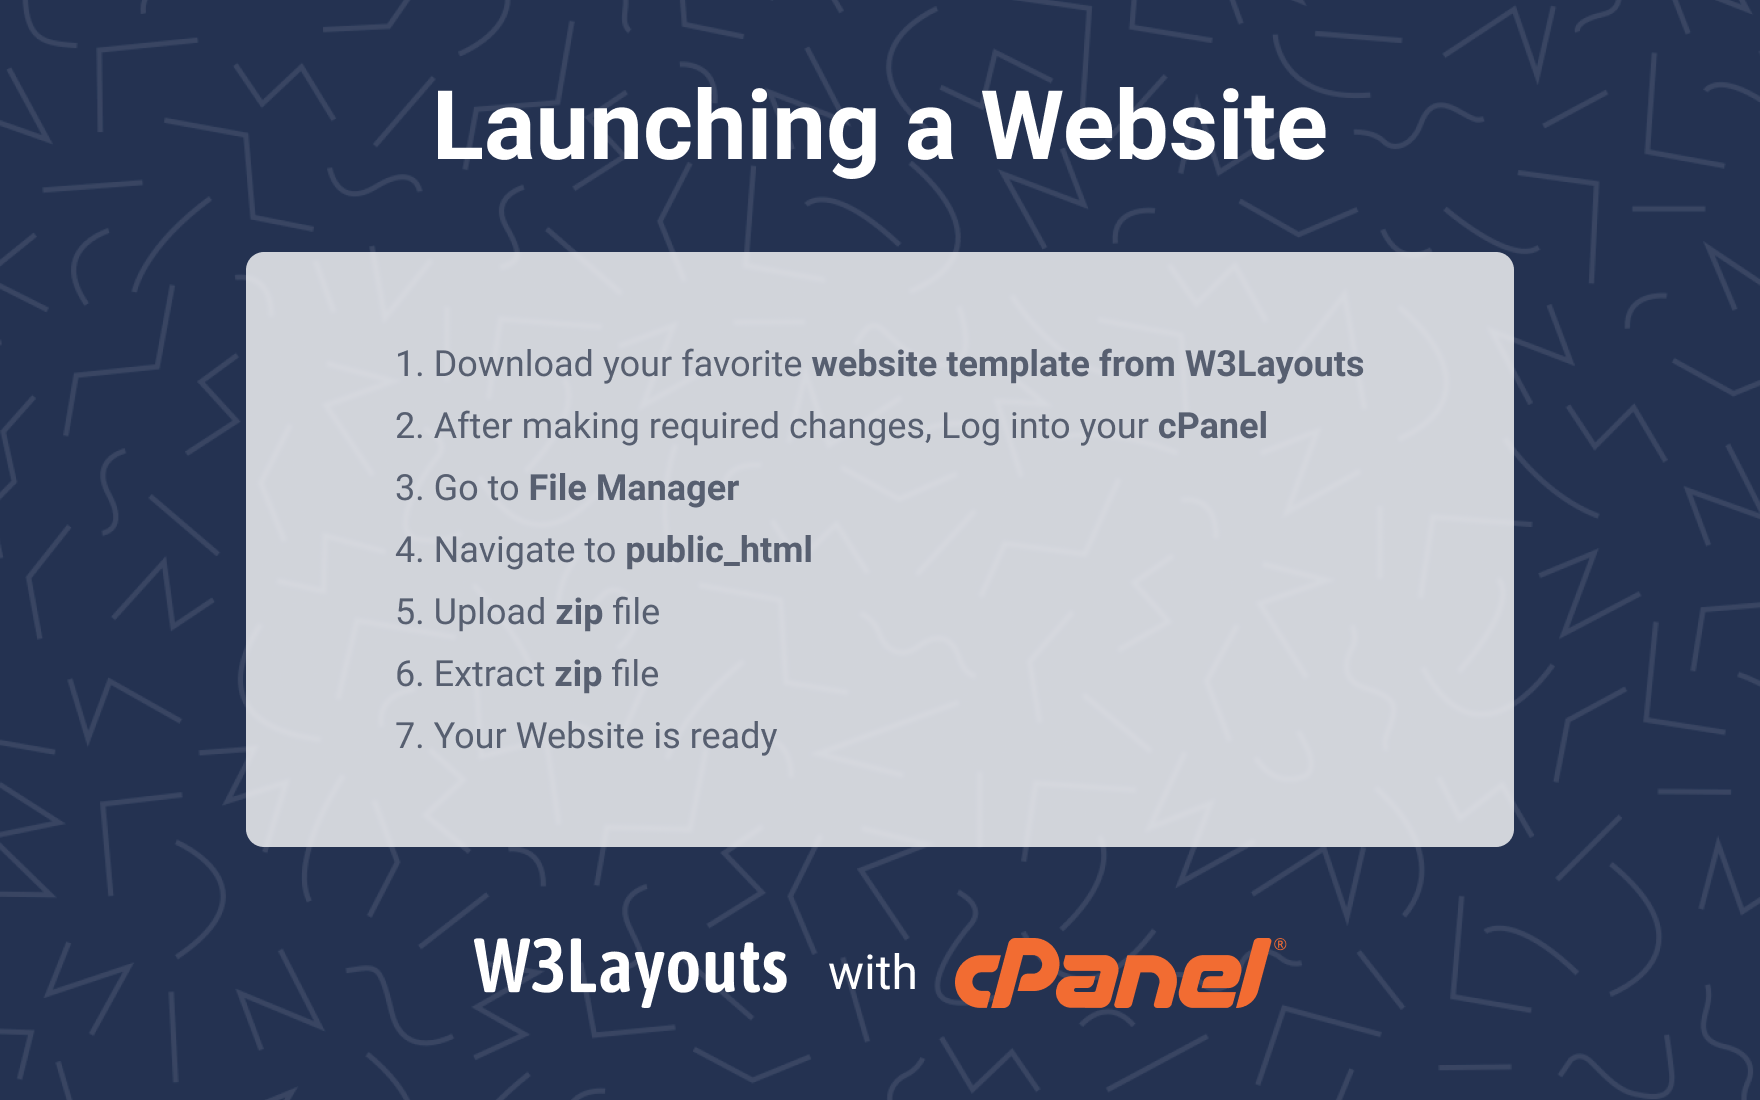
So you’re done building your website with our website templates and now you cannot wait to take it live. Well, there are a few more steps before you can see your stunning site live. To put it in simple words, all you have to do is upload your file to the cPanel.
What is a cPanel you ask?
cPanel is basically a Linux based web hosting control panel. Thanks to its simple GUI (graphic user interface) and automation tool, cPanel makes for a fairly easy process of web hosting. The control Panel successfully creates an environment for an easy execution of handling the administration of a website and the server via a web browser. Let’s not dive more into the complexity of how cPanel manages to do this. Instead, let’s look at how you can make your website live with the control Panel.
- Visit your cPanel portal at https://{IP address}/cPanel. For this example, we are using a sample domain 1w3.in. So, our URL for cPanel is http://1w3.in/cpanel.
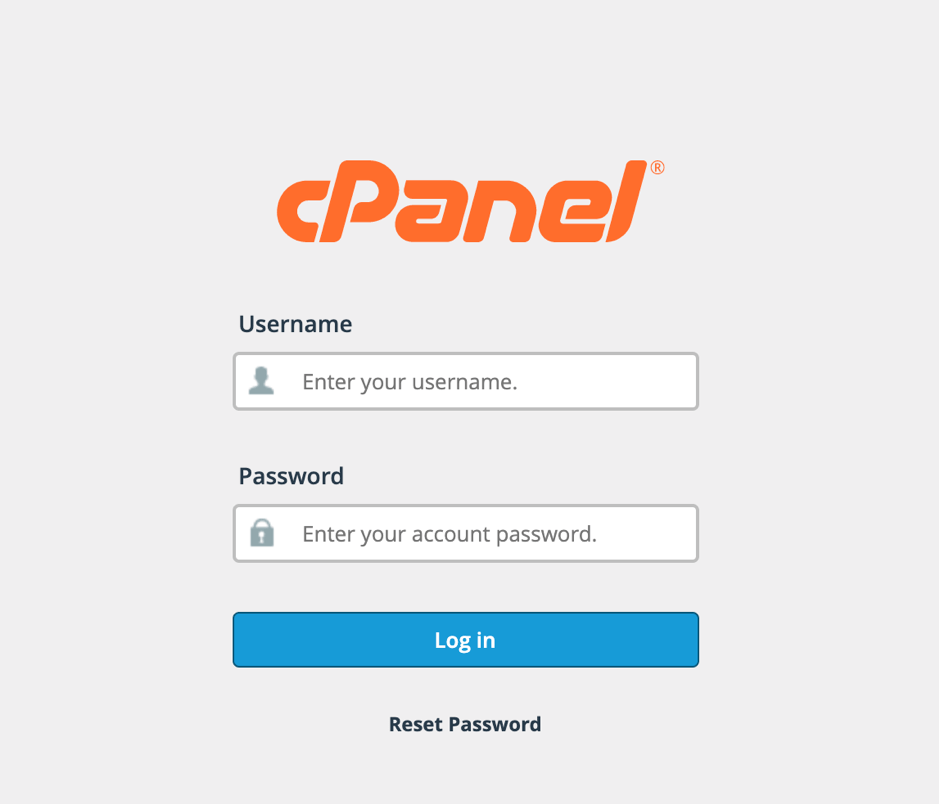
- Enter your Login details and click the Login button.
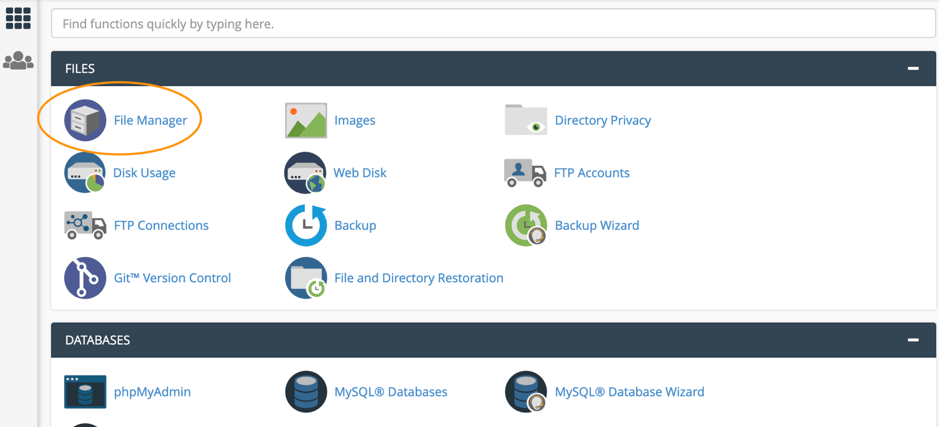
- Once Logged in, Click on the File Manager. You will be using the File Manager interface to manage and edit your files.
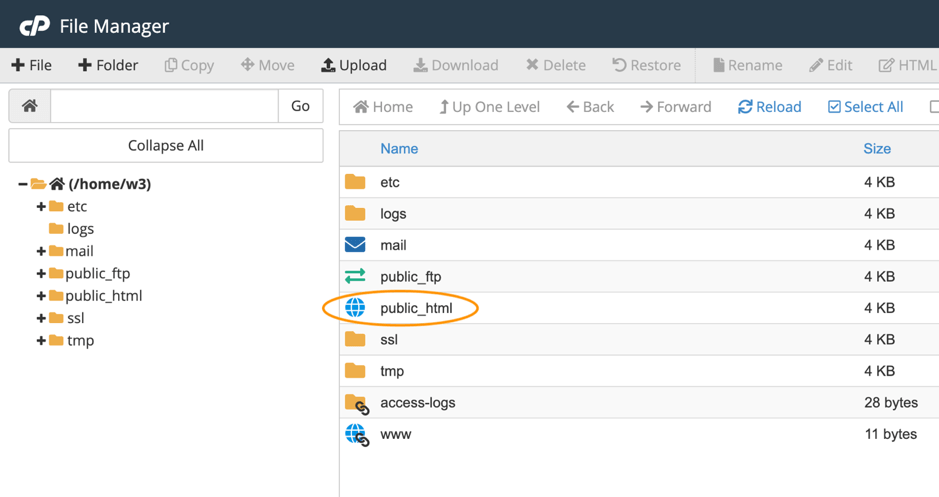
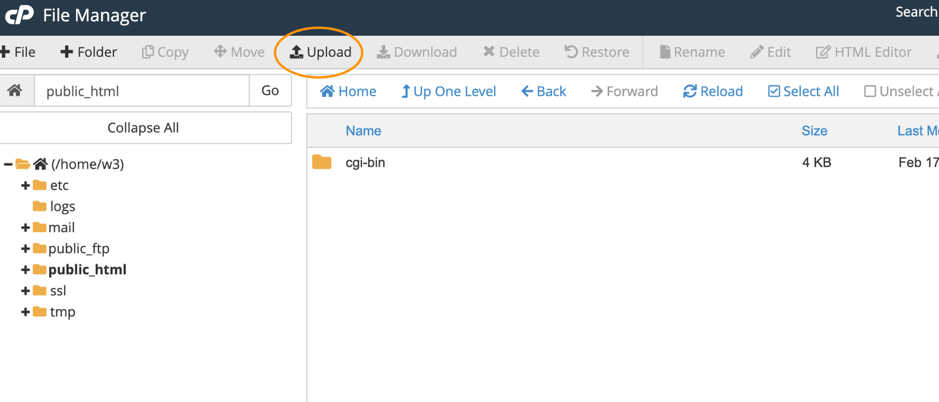
- You will see the below screen after clicking the File Manager icon. Double click on public_html. You will need to upload your zip folder to public_html, which is the root folder of your hosting account.
- After clicking public_html, you will see the below screen. Click the upload button from the top bar as shown in the picture.
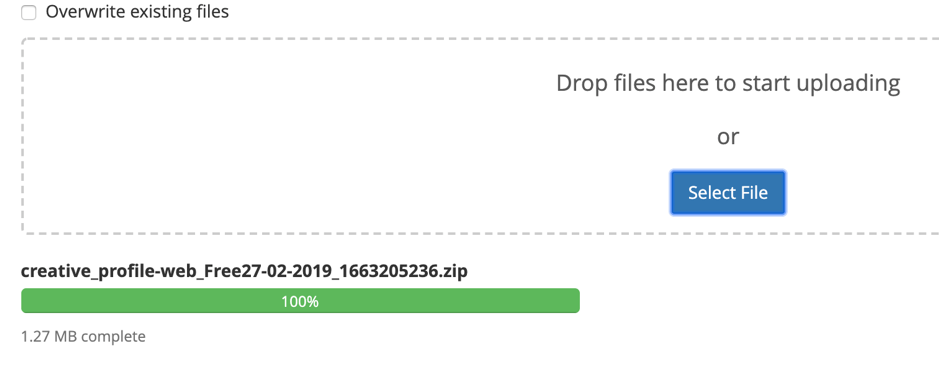
- Now upload the downloaded template zip or Edited template zip file from this Upload screen.

Upload done.
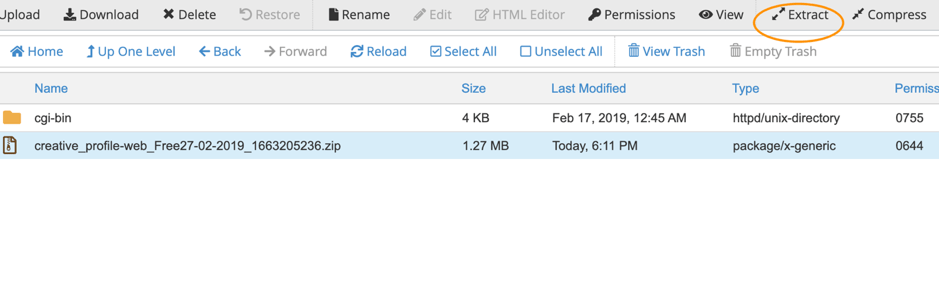
- Once the file is uploaded, close the upload tab and go to the File Manager tab. If the zip file doesn’t appear on this screen, refresh/reload the tab till you see a new zip file that has been uploaded.

- Select the zip file by clicking on it. Then click the Extract button from the top bar as shown in the picture below.
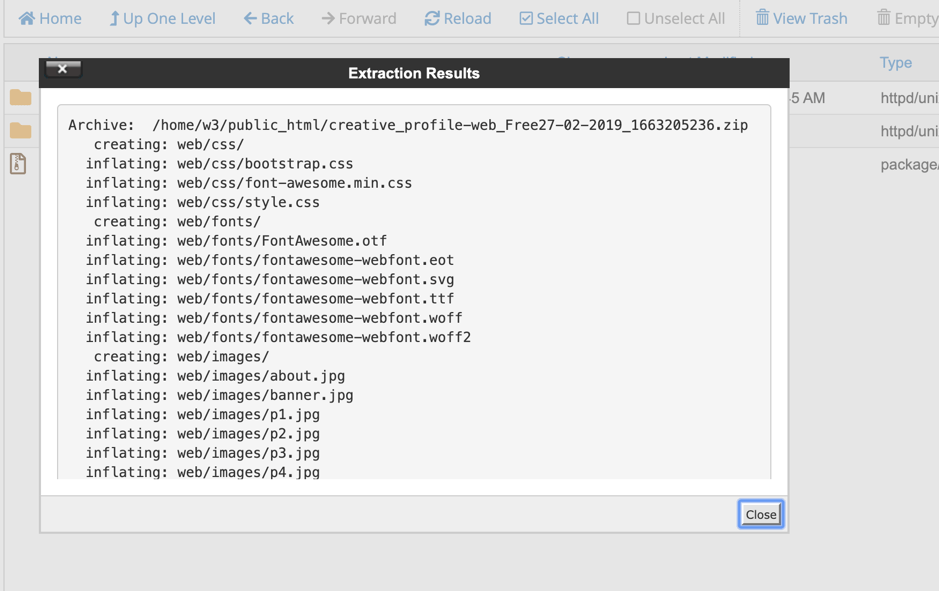
- Now, the file in the zip folder will be extracted to a web folder. You will have to move all the files under this web folder to public_html. Close the Extraction Results window when done.
- Open the web folder by double-clicking on it.
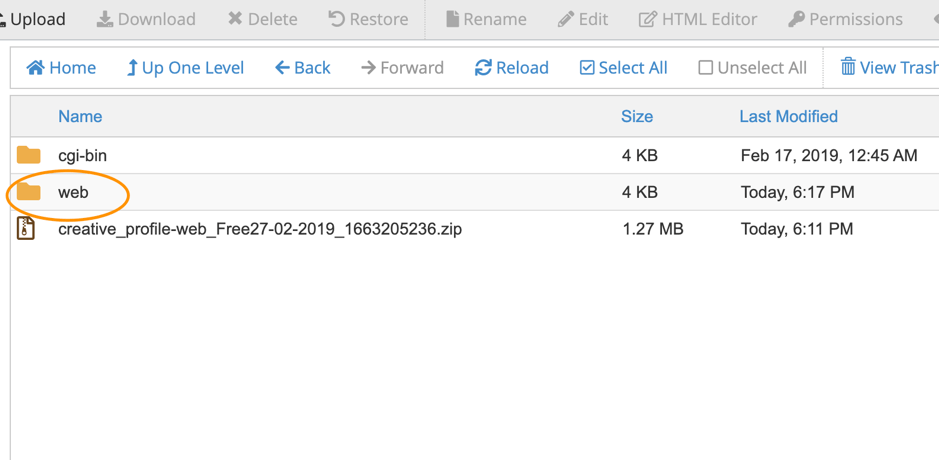
- Select all the files in the web folder and click the move button from the top bar as shown in the image below.
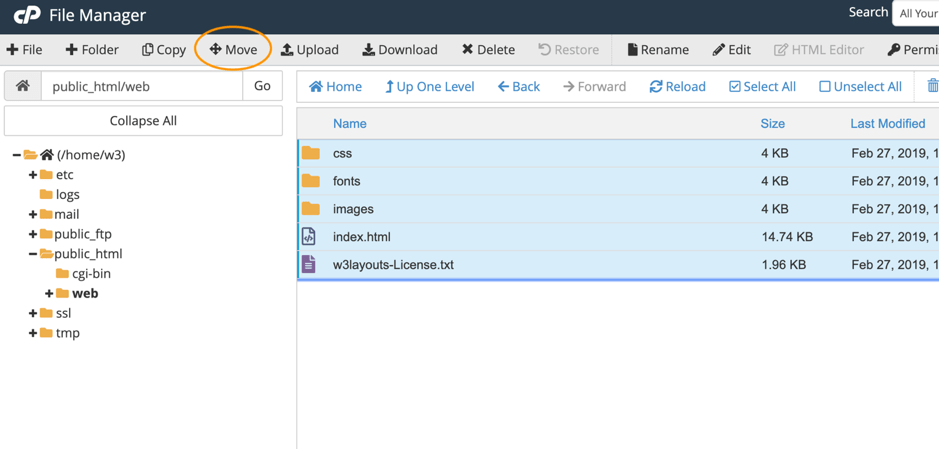
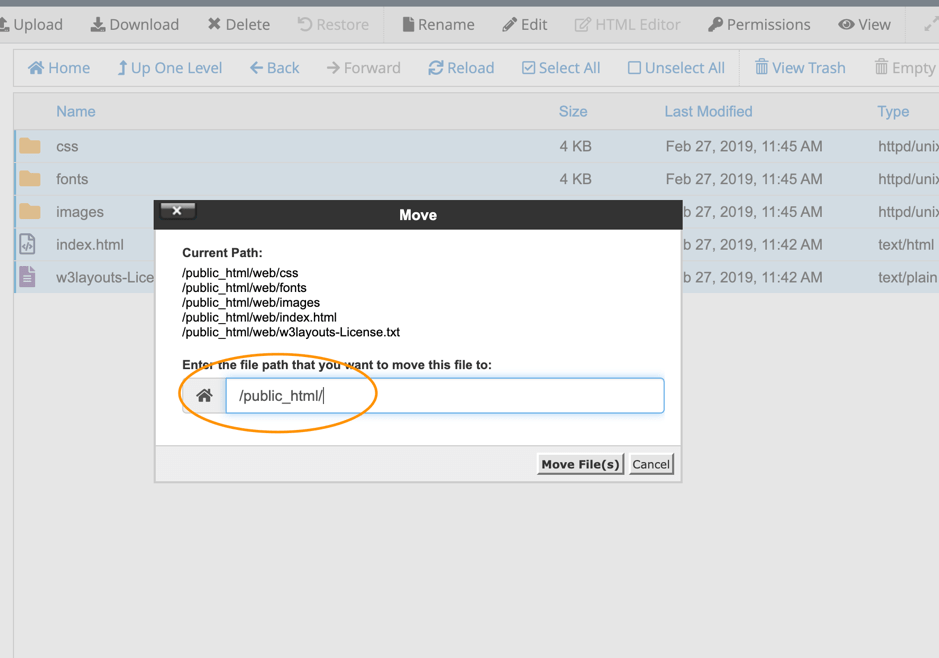
- After clicking on the move button, you will see a popup where you’ll have to change the destination of files to public_html. Once the files have been moved, the directory will become empty. Check once if the files have moved to public_html or not by navigating back to public_html.
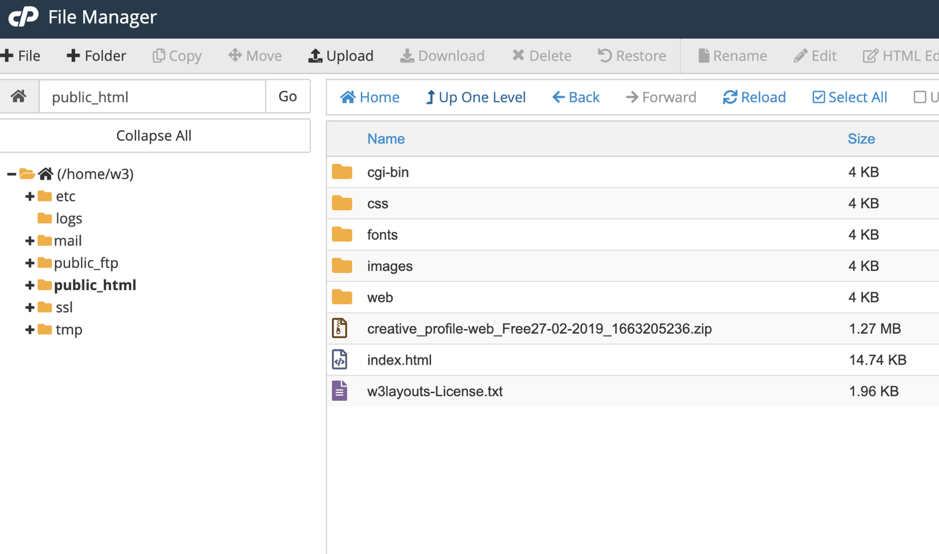
- Once all the files have moved to public_html and index.html file is placed, visit your domain or IP.
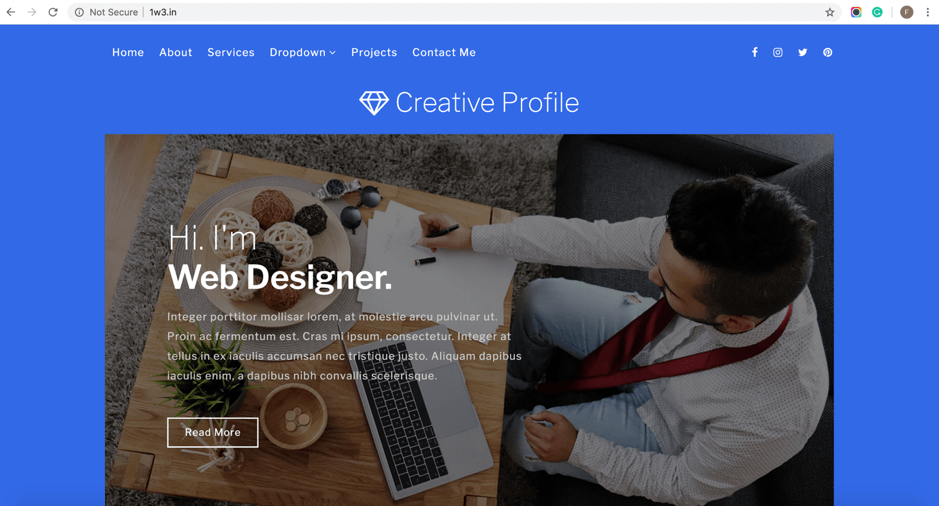
- Now visit your domain and see your website live. In our case, it is 1w3.in
Congratulations, now you’ve successfully launched your website using the cPanel. Make the most of your live website and keep using W3Layouts!