

If you want to deploy a website on Netlify then this step-by-step tutorial is for you. The simplest way to deploy your website. let’s take a look at how to deploy a static website on Netlify.
Getting started on Netlify In this article, we will show you how easy it is to launch/deploy your site on Netlify. It is very simple and easy! Follow the steps below:
Step1: Creating a Netlify account.
Step2: Drag and drop site output folder.
Step3: Building and deploying your site.
Step4: Changing the site name.
Step5: Site goes live on Netlify.
1. Create a Netlify account
If you are not already a Netlify user, go ahead and sign up for free first. Select your preferred signup method or use your email.

After sign up, you will get a verification link to your mail. Click on the link to very your mail, and then you’ll be redirected to the login page. Once you’ve logged in, you’ll be taken to https://app.netlify.com. You’re now already a Netlify member and should be brought to your new dashboard. The Netlify dashboard should look similar to this:

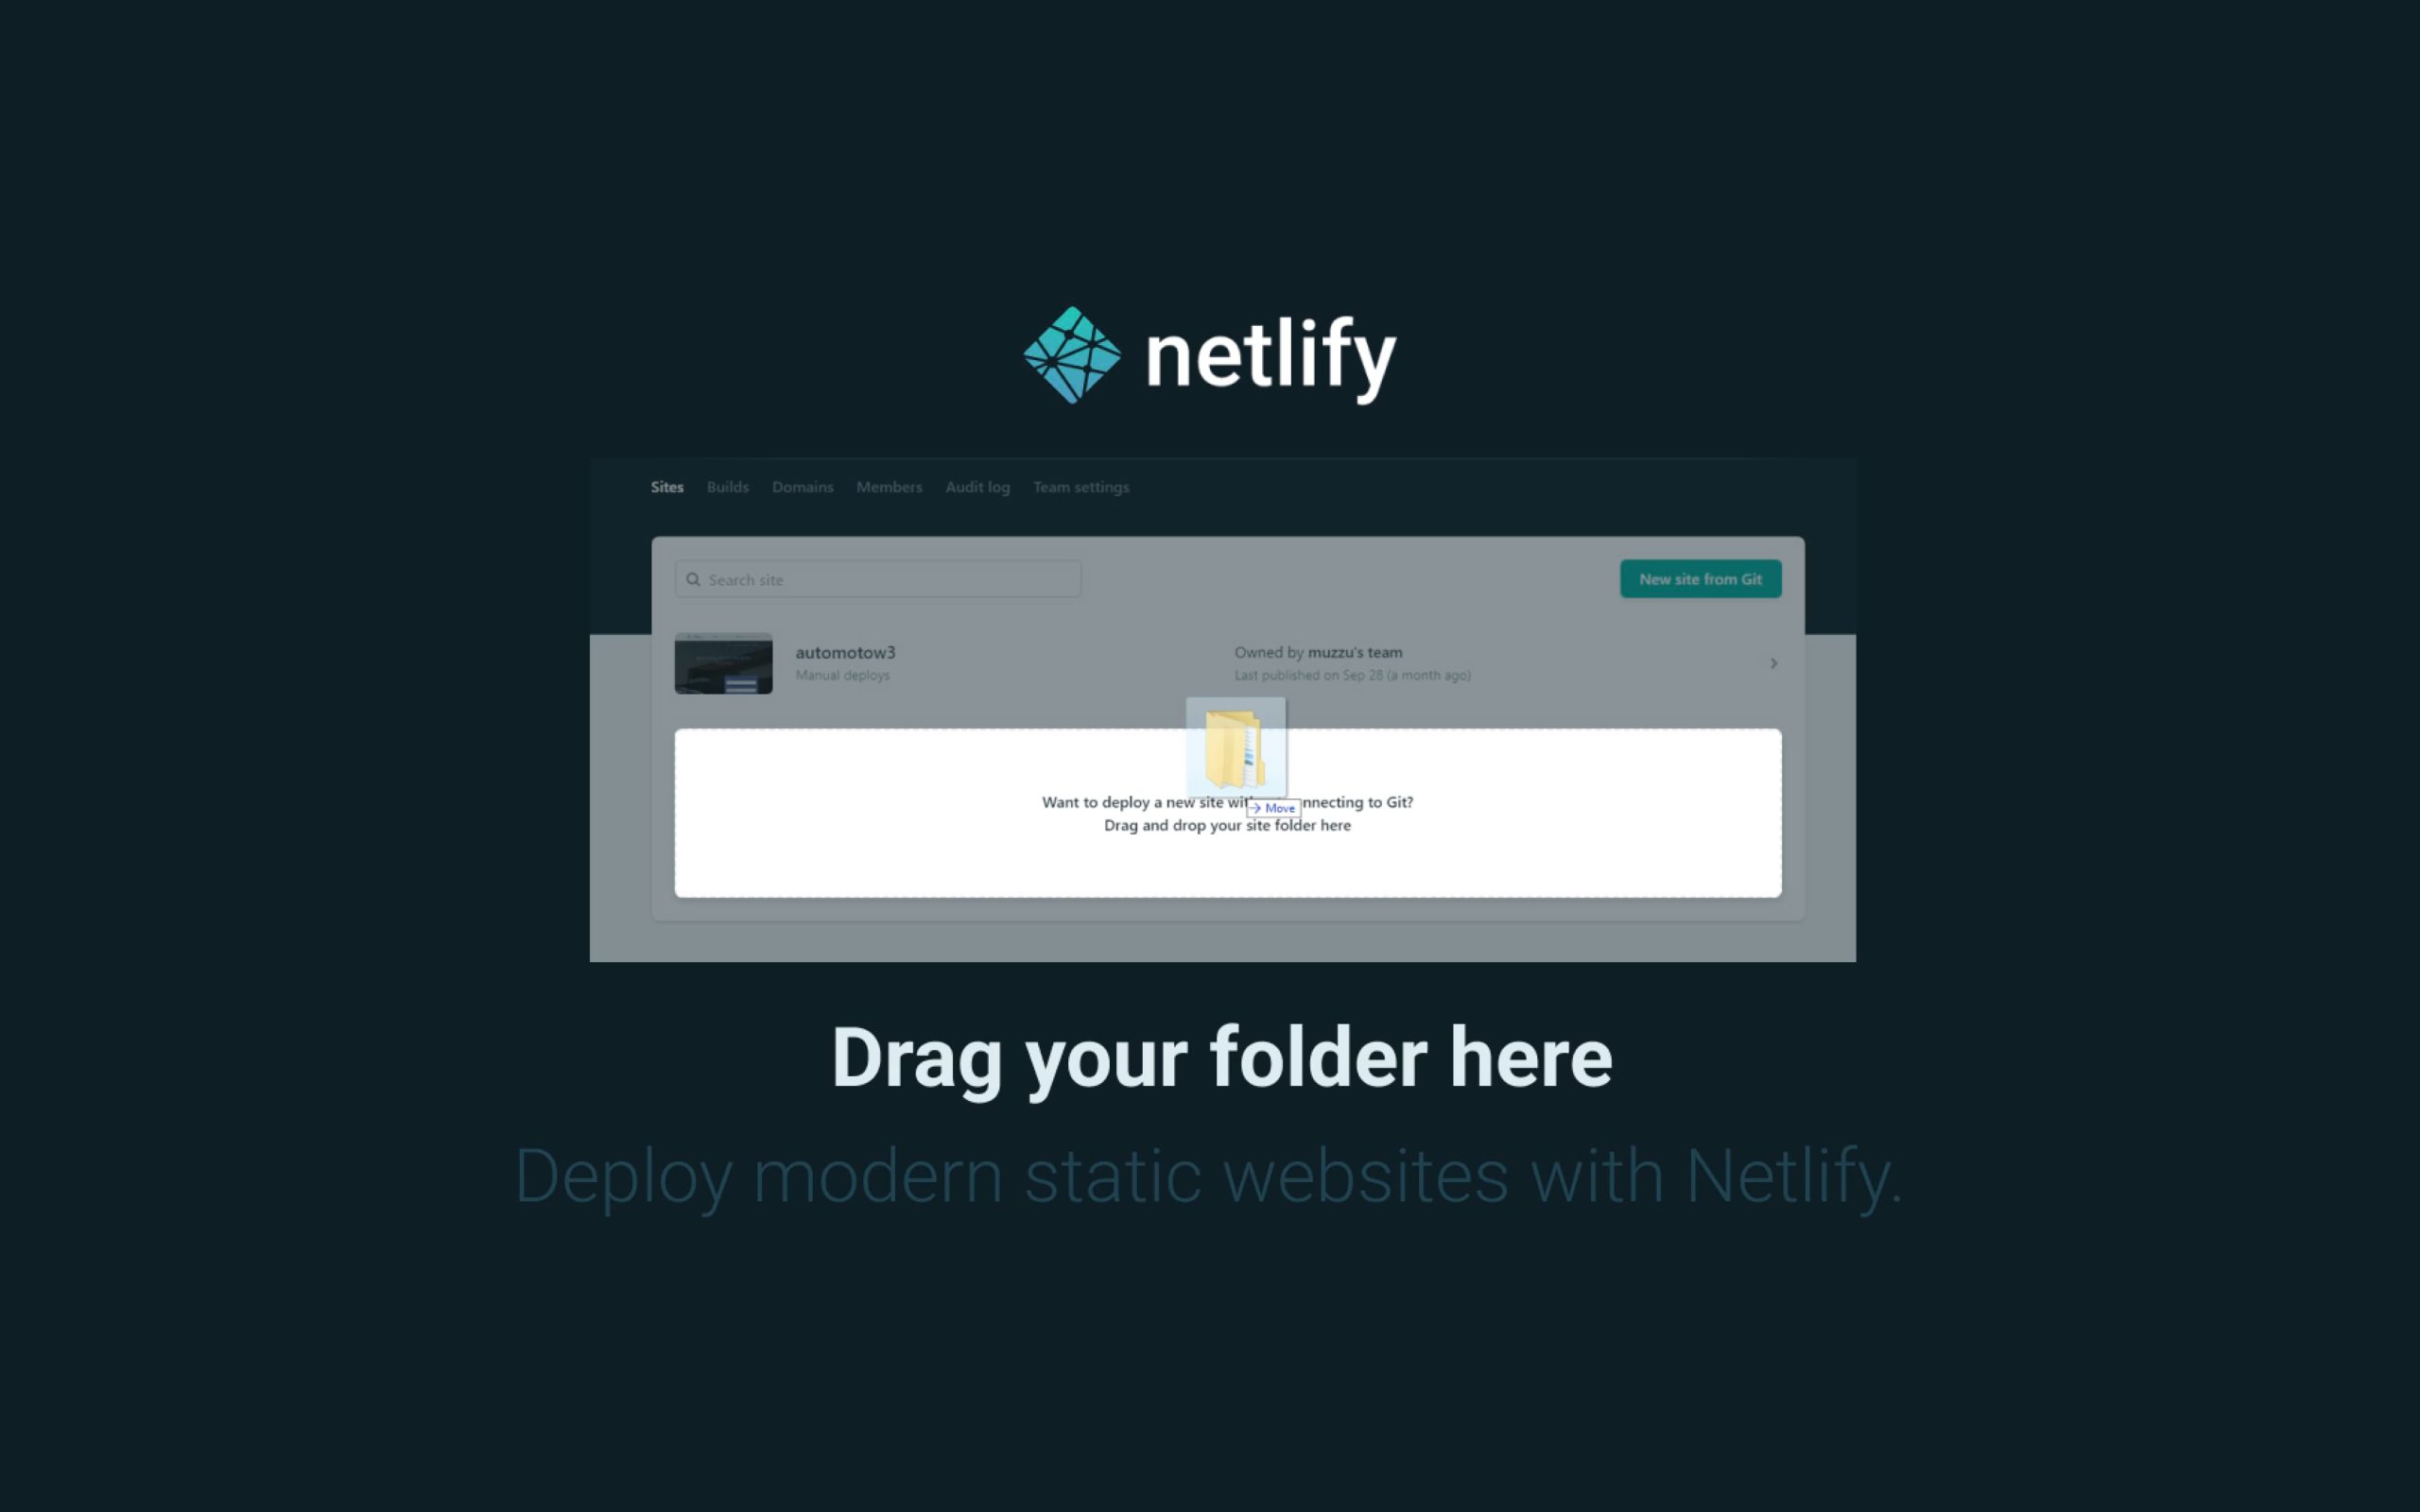
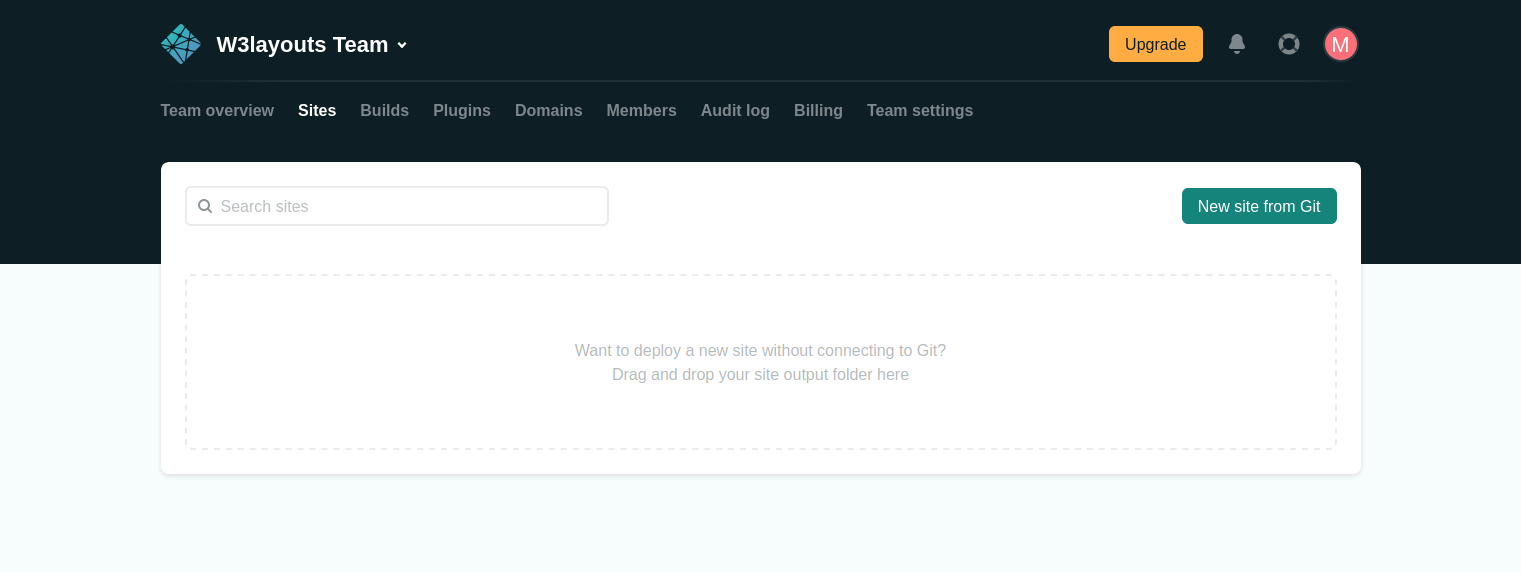
2. Drag and drop the site output folder
Now, we need to drag and drop the site output folder. Go to sites tab, drag and drop the sites output folder here
3. Build and deploy your site on netlify
Now it’s time to sit back and relax. You did your part let Netlify take care of the rest — it’ll only take a minute.
We should now be redirected to the dashboard of our deployed webpage, which should look like this.

To check out the deployed webpage, simply click on the link highlighted in green.
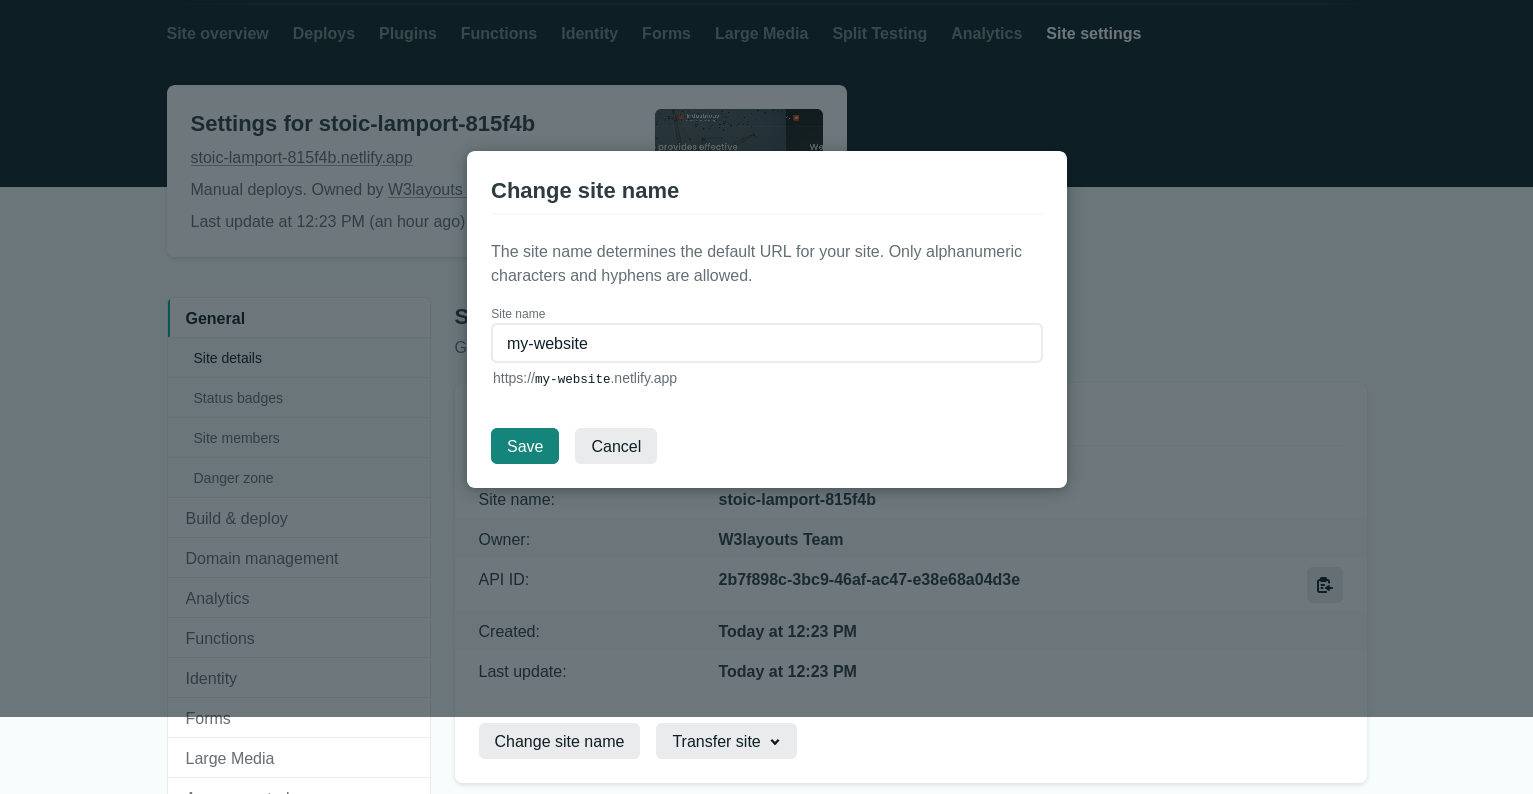
4. Site Name
Netlify automatically generated a temporary name for the link. Let’s quickly update that to make it look a little prettier. To update the URL, go to site settings > change site name.

5. Your site is live
BOOM! You now have your site deployed on Netlify and is live, up, and running. Just click on the link and see the magic.
Have a look on related articles: